How to Replace A Showerhead

Are you tired of your old, worn-out showerhead? Replacing it is a straightforward way to revamp your daily shower routine. By choosing a new showerhead, you can enhance your showering experience and potentially reduce your water bills by opting for a water-saving model. Additionally, if you’re dealing with low water pressure, you can select a high-pressure showerhead to address this issue.
This guide will walk you through replacing your showerhead, from choosing the right model to the necessary equipment and step-by-step instructions for a hassle-free installation.
Choosing the Right Showerhead
The sheer variety of showerheads available today can be overwhelming if you’re unprepared. Showerheads come in various styles and models, including handhelds, wall, and top mounts. To make an informed decision, it’s essential to research and understand the different options and their features.
Some showerheads offer unique features such as adjustable pressure, water-saving capabilities, temperature control, built-in music, lights, and even call receivers to elevate your showering experience.
When selecting a new showerhead, consider its flow rate. Most standard showerheads release 2.5 gallons per minute, but if you prefer a lower flow, look for showerheads labeled as 2 gallons per minute or less. For efficient water usage, check for the EPA WaterSense label.
Essential Equipment
Gather the necessary equipment and materials before starting your showerhead and shower pipe replacement project:
- Slip-Joint Pliers: Used to secure a grip to replace the shower arm
- Thread Seal Tape (Teflon Tape): Essential for creating watertight seals
- Adjustable Wrench: Necessary for removing the old showerhead
- Soft Rag or Towel: For cleaning the shower arm
- A New Showerhead: Your chosen replacement showerhead
Improve Your Shower Experience
Revamp your shower routine with these straightforward steps for replacing your showerhead. Follow these user-friendly guidelines to get started.
- Turn off the faucet: Turn off the water faucet before removing your current showerhead. No need to shut off the entire home’s water supply. This step will prevent water from splashing everywhere as you remove the old showerhead.
- Remove the existing showerhead: Attempt to unscrew it by hand, turning it counterclockwise. If it doesn’t loosen, you might require some tools.
- Grab slip-joint pliers and wrap thread seal tape around the jaws.
- Use the pliers to grip the shower arm firmly.
- Employ an adjustable wrench to carefully unscrew the showerhead counterclockwise until it comes off.
Clean the shower arm: Ensure a smooth installation for your new showerhead by preparing the shower arm properly. Follow these steps for a seamless transition to a revitalizing shower experience.
- Use a clean rag to wipe down the shower arm.
- Remove any rust, mineral deposits, debris, or dirt.
- Eliminate old tape and sealant residue from the shower arm.
- Change shower arm if desired.
- Apply thread seal tape on shower arm threads: Securely wrap thread seal tape clockwise around the shower arm threads two to three times. Ensure the tape adheres firmly. This tape will prevent any leaks while installing the new showerhead.
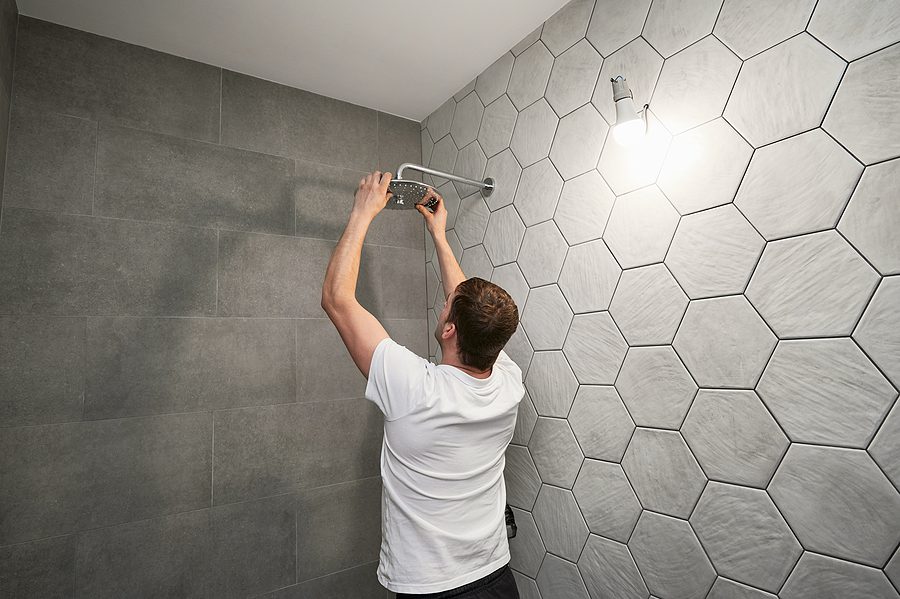
- Install the new showerhead: Installing your new showerhead depends on its type, but the process is straightforward. Wrap Teflon tape around the threads of the new showerhead to create a watertight seal. For a wall-mount or top-mount showerhead, attach it to the shower arm by hand and twist it clockwise until it’s securely fastened. If you have a handheld showerhead, connect the mount to the arm by twisting it clockwise. Then, attach the hose to both the mount and the showerhead by hand. For a combo showerhead, follow a similar procedure: attaching the diverter to the shower arm, connecting the shower mount to the diverter, and securing the hose to the mount and showerhead.
- Check for leaks: After replacing the showerhead, don’t forget to check for leaks. Turn on the water and inspect the joints for any signs of water seepage. If you spot leaks, turn off the water, disassemble the head, and reapply Teflon tape to secure the shower arm threads. Reassemble and recheck for leaks after turning the water back on.
Most showerhead and shower head pipe replacements can be done with basic tools, but if you encounter any difficulties or don’t want to DIY it, contact us today for a free estimate.

